Develop Reporting Layer Using SQL Views

Business Scenario
Welcome!
Today is your tenth day as a Data Analyst at our company.
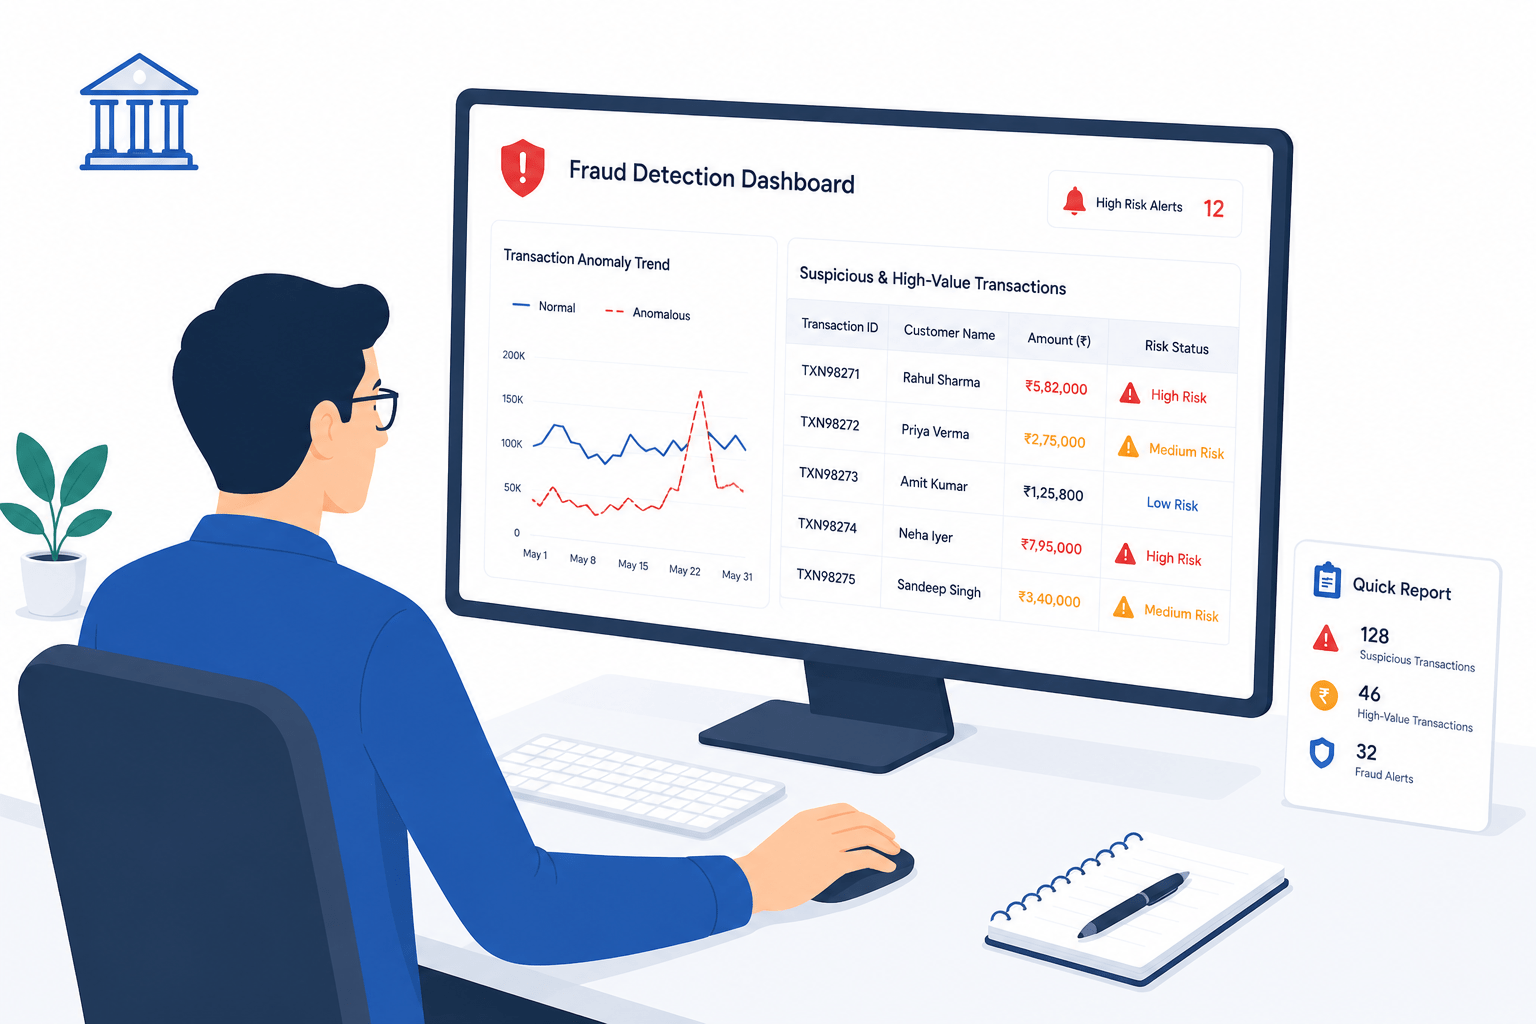
The fraud detection team needs a simplified reporting layer to identify suspicious and unusually high-value transactions.
Analysts often repeat complex queries to detect potential fraud.

Pre-Lab Preparation
Topic: Simplifying Fraud Analysis with SQL Views
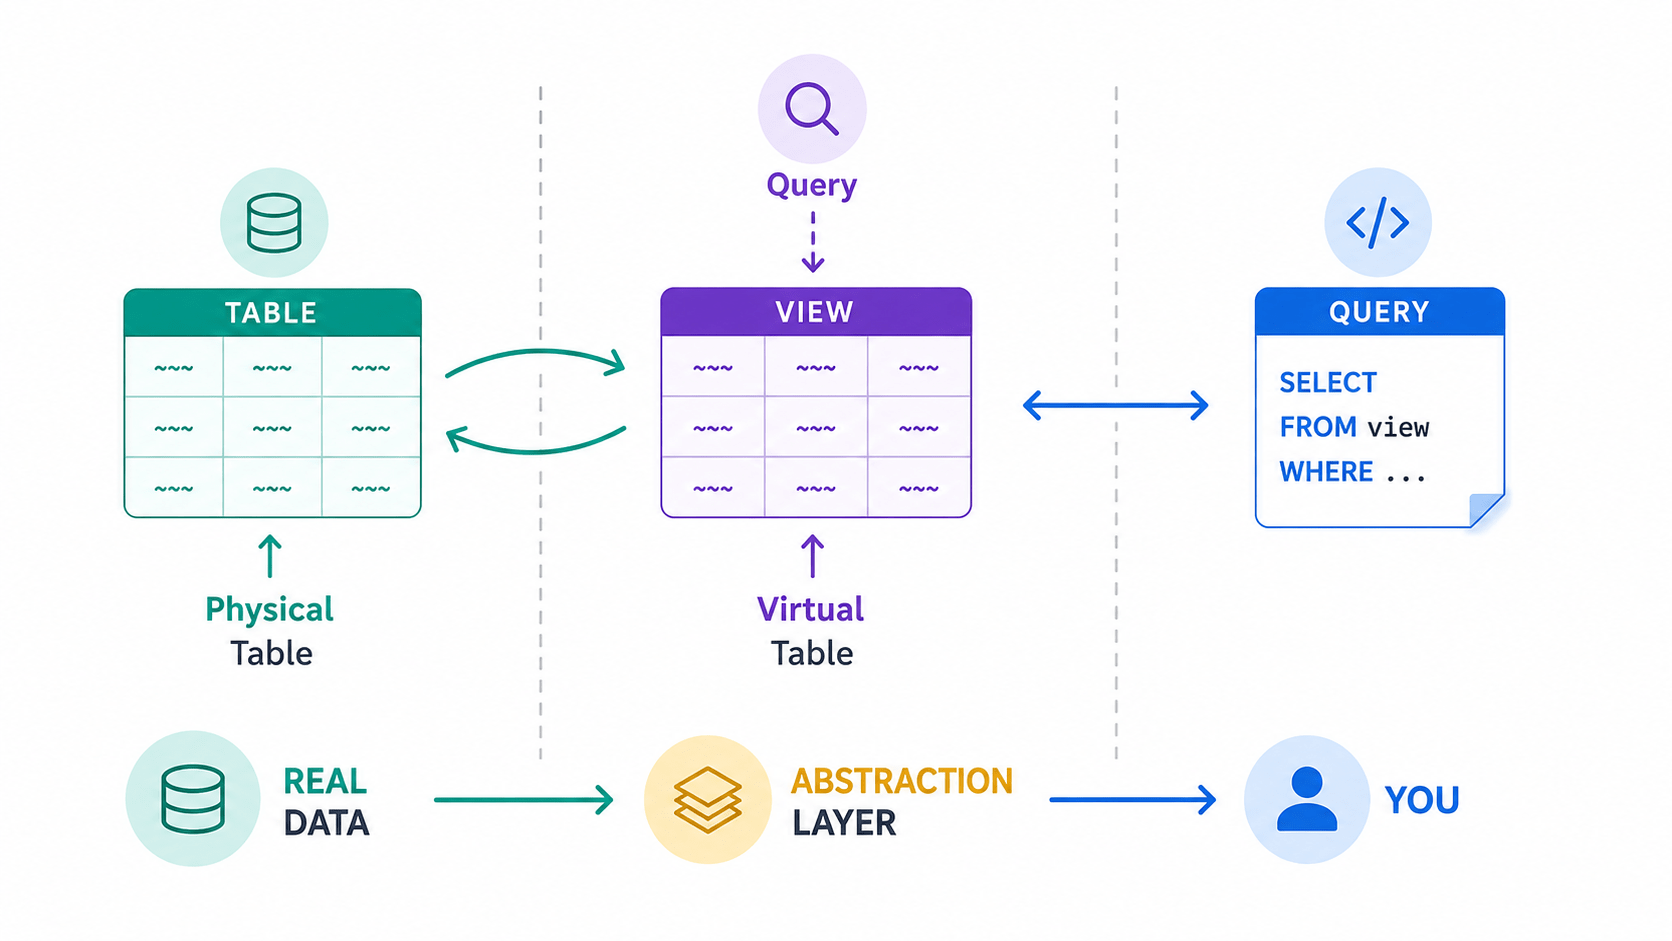
1) Introduction to SQL Views
2) Advantages of SQL Views
3) Types of Views
git pull origin branchName
Git Pull
Task 1: Create a View for Suspicious High-Value Transactions
As part of the fraud investigation, the bank wants to focus on transactions with unusually large amounts. Analysts have decided that any transaction above ₹75,000 should be treated as suspicious and reviewed further.
Instead of writing the same filter condition every time, we create a reusable view that stores all such high-value transactions. This allows the fraud detection team to access suspicious records instantly and makes reporting faster and more efficient.

Task 1: Understanding BRD
Before you start building anything, you need to clearly understand what the client actually wants.So, let’s begin by understanding the BRD (Business Requirement Document) shared by the client.
BRD Full Form is Business Requirement Details.BRD like a plan for building a house. This plan helps the builder understand what to build.In the same way,BRD tells developers what the client wants to build
Click to download BRD : BiteBox_BRD.pdf
Activity
After going through BRD list down the Core Features and Web Pages in the tabulated Format as shown Below.
| Col 1 | Col 2 | Col 3 |
|---|---|---|
| Row 1 | ||
| Row 2 | ||
| Row 3 |
Formula
Profit = Revenue - Cost
Task 2: Create WireFrame
Now that you understand the requirements, don’t jump into coding yet. Before development, we always visualize the layout.
Now lets create a simple wireframe for the homepage.
A wireframe is like a layout plan of a house. Before building, you decide where rooms, doors, and windows will be placed.Similarly, a wireframe helps you plan where elements like headers, images, and buttons will appear on a webpage—before adding design or colours.
Task 3: Code Editor Installation
Good work on completing the planning phase.
Now we will start development. Before that, make sure your system is ready with the required tools.
In this step we will install the VS code editor that will help to Write code efficiently,Organize files , Run and test your application
Go to the visual studio code official website
1
Click to download Homepage Wireframe : Homepage Wireframe
Great job!
You have successfully completed your first lab on BiteBox Project Onboarding.
In this lab, you have: Understood the BRD, Created a wireframe, Set up your development environment, Organised your project structure, Run your first program
You are now ready to move to the next stage of development
Checkpoint
Next-Lab Preparation
Git Push
git push origin branchNameTopic : Working with a Text and Listin HTML
1) Power of HTML text tags
2) Customizing your style with CSS
3) Listing it right using HTML
4) HTML Link up , attributes of tag, block vs inline elements
Text box Width : 887
Business Scenario, Pre-lab Preparation, Next-lab Preparation, Task, Activity, Checkpoint : 90%.
Steps : 1,2,3 [Sub Steps - a,b,c]
Normal Text, Topic Name : 80%
Subtopic : 70%
Code Box font Size : 16px